The Interface
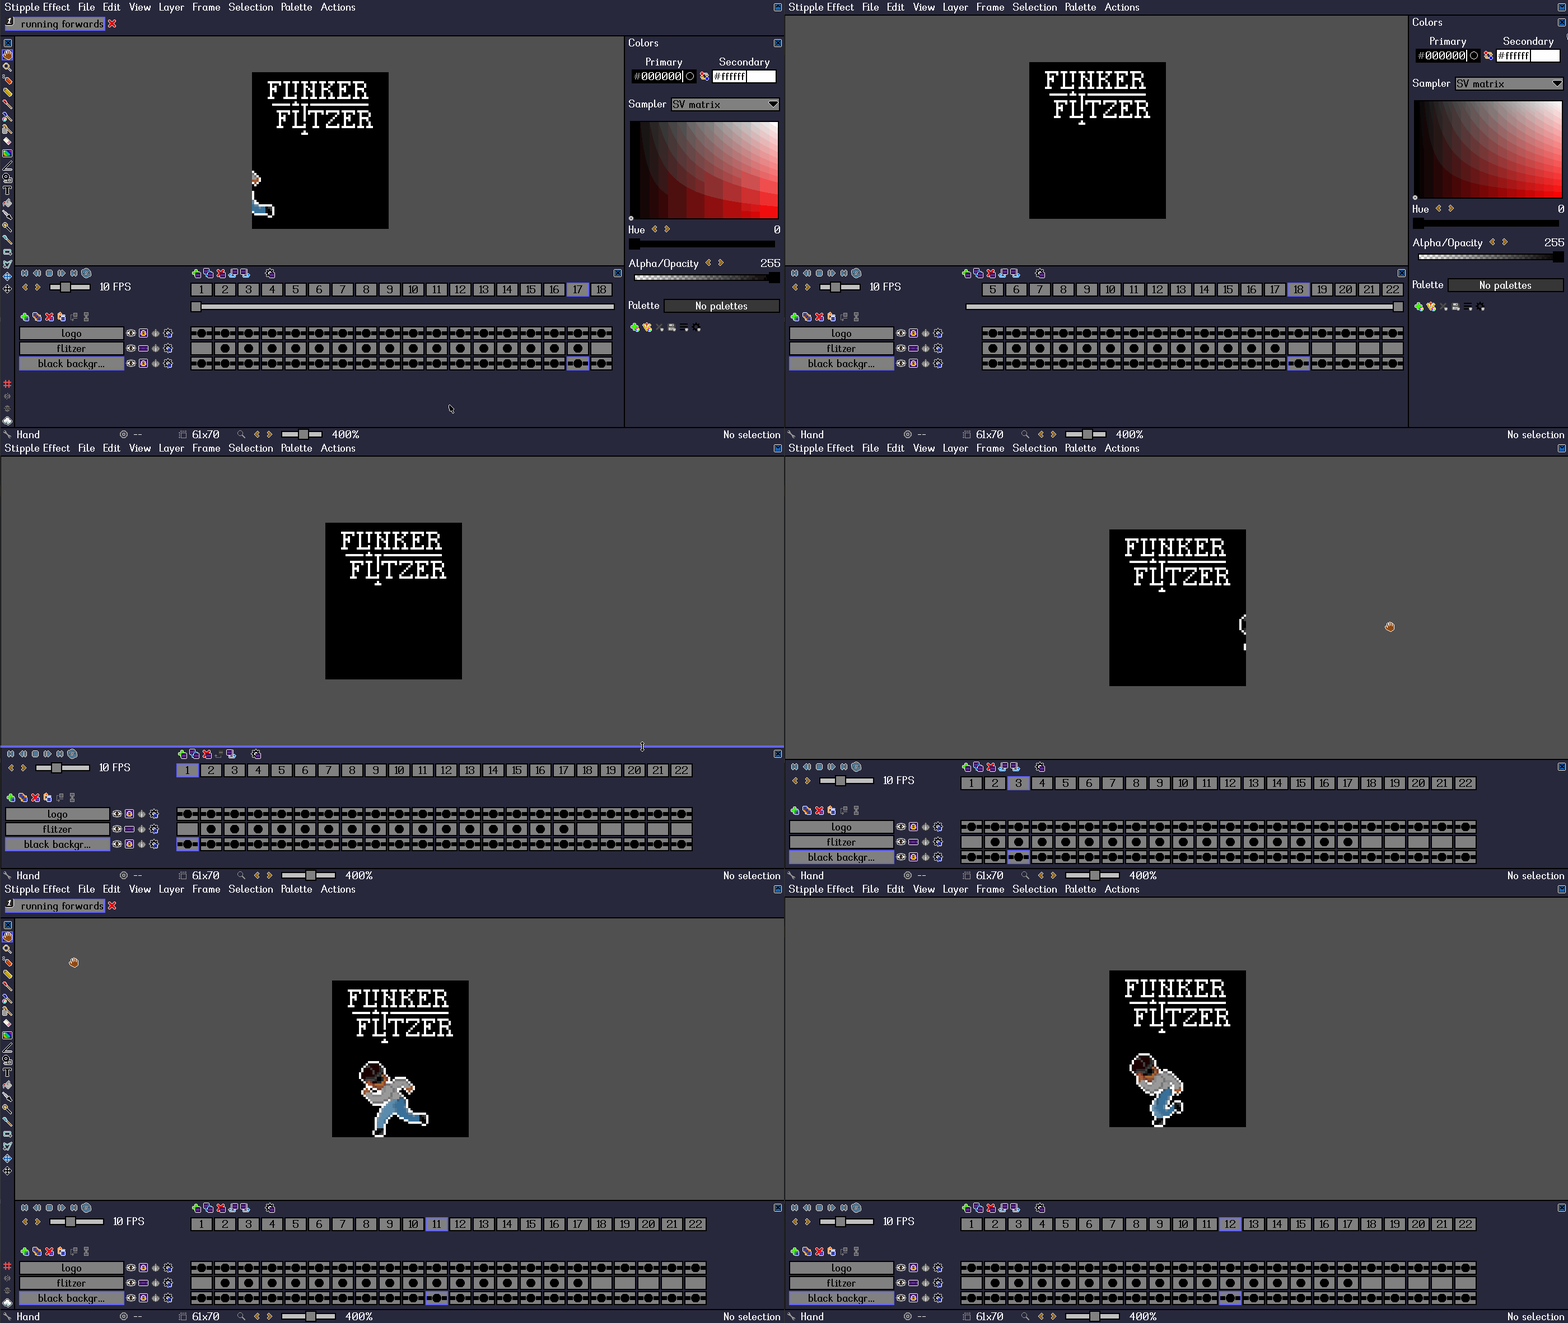
The program interface consists of a viewport called the “workspace” surrounded by a series of panels. Any of these panels can be hidden according to the preferences of the user or the demands of the task at hand.
Sections
For information about the preview window, please visit its dedicated page.
Navigation bar

Most program actions can be accessed via the navigation bar. Actions with keyboard shortcuts display the shortcut next to the action description in the navigation dropdown.
Projects

The Projects panel displays the projects that are currently open in the program. Projects 1 through 9 can be selected with the matching hotkey (1 - 9).
Workspace
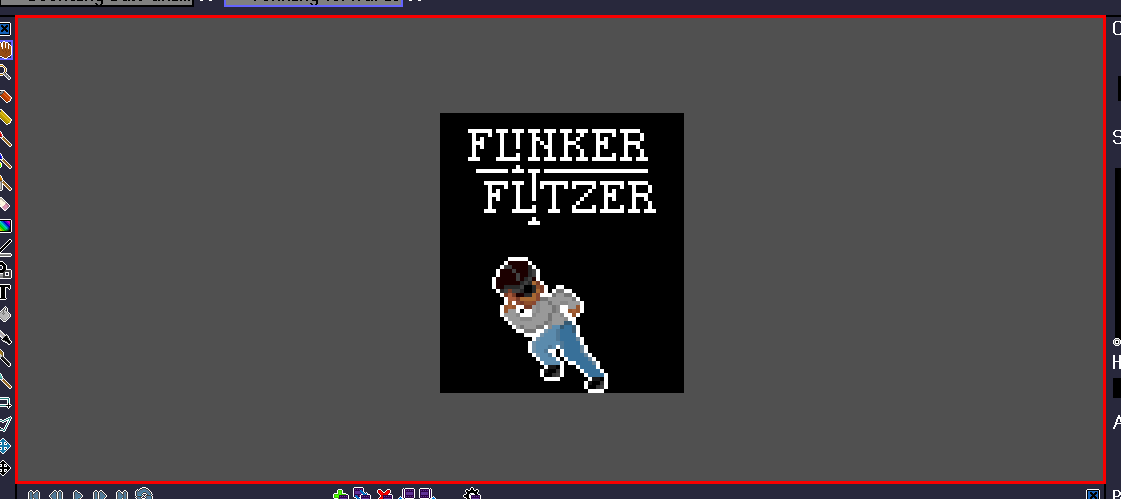
The workspace displays the contents of the active cel (the active layer at the current frame index). It is the main editing viewport in Stipple Effect.
Toolbar
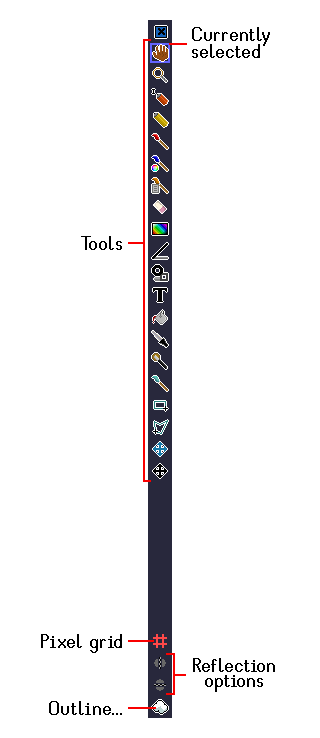
Tools
The upper section of the toolbar displays the program’s editing tools. The currently selected tool is indicated by a square surrounding the tool icon.
Additional
The lower section of the toolbar houses the pixel grid toggle, the reflection options, and the outline configuration.
The pixel grid icon may be greyed out if the workspace zoom level is too small to display the pixel grid at its current configured size.
The reflection actions require a selection; the icons will be greyed out if no pixels are selected.
Tool options

Most tools have properties that can be modified to alter their behaviour called “tool options”. The tool options appear in a horizontal bar above the workspace.
Flipbook
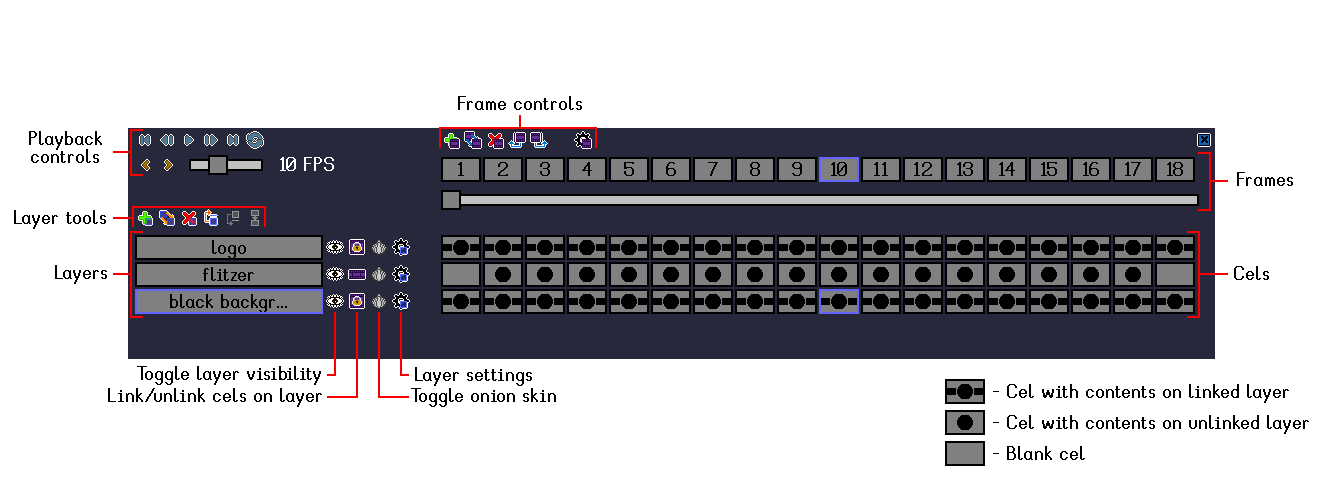
The flipbook is the primary project organization panel. Projects in Stipple Effect consist of layers and frames; the flipbook is designed to display these in the most coherent way possible.
Layers
The layers of the current project are displayed along the left side of the flipbook panel. Layers are sorted according to their render order: layers at the bottom are rendered first and the layers above them are rendered afterwards, on top of the layers below them. Layer buttons can be dragged and resorted. Alternatively, layers can be resorted with the “Move layer down” and “Move layer up” buttons.
Next to the layer buttons are several icons1:
- toggle layer visibility
- link/unlink cels on layer
- toggle onion skin
- layer settings2
1 - Bold listings indicate icons whose actions constitute an edit.
2 - Opening the layer settings does not constitute an edit, but modifying a layer property like its name or how it renders onion skins does.
Frames
The frames of the current project are displayed along the top of the flipbook panel. Like layers, frame buttons can be dragged and resorted. A frame with a custom duration will have an asterisk (*) following the frame number.
Playback
The playback controls are:
- to first frame

- previous frame

- play
 / stop
- next frame

- to last frame

There are several playback modes that can be cycled through:
- play forwards

- play backwards

- loop

- ping-pong
 (changes directions when it reaches the beginning or end of the animation)
Users can also set the playback speed, ranging from 1 frame per second to 24 FPS.
Cels
A cel is the intersection of a layer and a frame.
A cel can be selected by clicking on its button. A two-dimensional range of cels (matrix) can be selected by Shift-clicking a destination cel. The range will span from the currently selected cel to the destination cel.
Cel buttons have different icons depending on their cel’s contents:
- An empty cel (cel with no non-transparent pixel data) is blank
- A cel with pixel data on a linked layer (
 )
) - A cel with pixel data on an unlinked layer (
 )
)
Colors
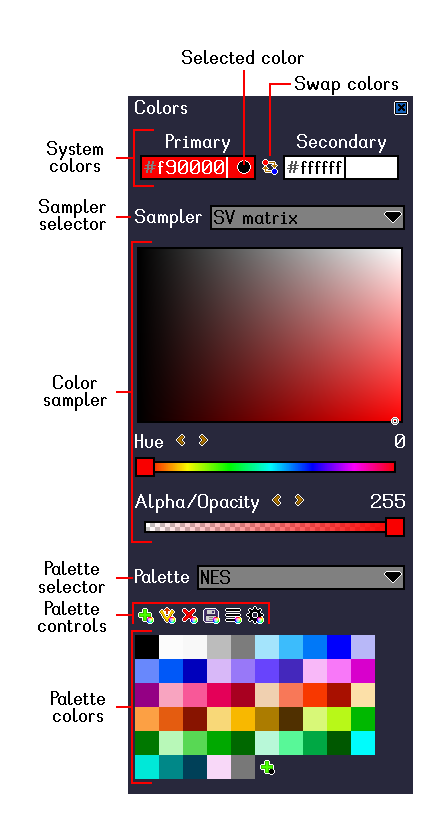
System colors
Stipple Effect uses two customizable system colors. For most tools that use or set the system colors, left-clicking ( ) is associated with the primary color, while right-clicking (
 ) is associated with the secondary color. The colors allocated to the primary and secondary slots can be swapped.

Either the primary or secondary color slot is selected at any given time. The slot that is selected is indicated by a black dot to the right of the slot’s color hex code. The selected slot color is the color that is displayed by the color sampler. Adjusting the slider, matrix or wheel values of the sampler will adjust the color in the selected slot. The selected slot can be changed by clicking on either the primary or secondary color textbox.
Samplers
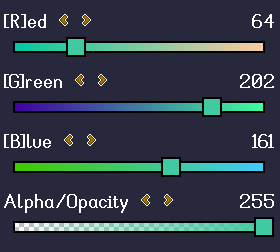
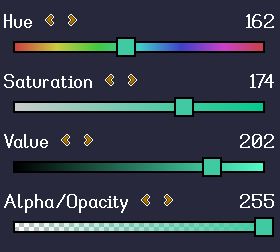
A color sampler is a particular way of representing the RGB color model. The program supports various color samplers:
RGB Sliders
HSV Sliders
Color Wheel
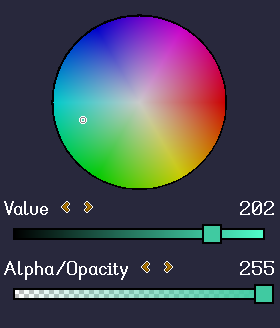
The color wheel represents hue and saturation. Hue represented by the angle of the selection around the wheel, while saturation is the distance of the selection from the center of the wheel.
Value is represented as a separate slider.
SV Matrix
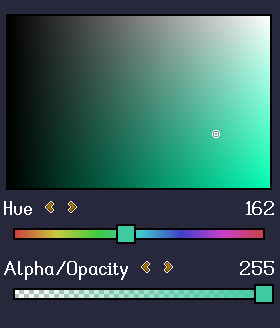
The SV matrix displays a two-dimensional gradient of saturation and value. This can be used to easily visualize the range of intensities and brightnesses of a particular hue.
Hue is represented as a separate slider.
Normal Map
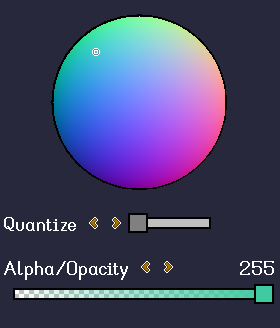
Normal mapping is a technique most often used to simulate lighting. A “normal map” is a type of asset that is used in conjuction with a standard texture to represent the surface normals of the object represented by the texture. These surface normals can then be used to simulate lighting based on a light source.
The normal map sampler in Stipple Effect can be quantized for a limited set of directions or faces, which may be more pertinent to a pixel art context.
Read more about normal maps here .
.
Palettes
Pixel art often uses a restricted color palette. Stipple Effect lets users easily create, edit, save, import, and delete palettes.
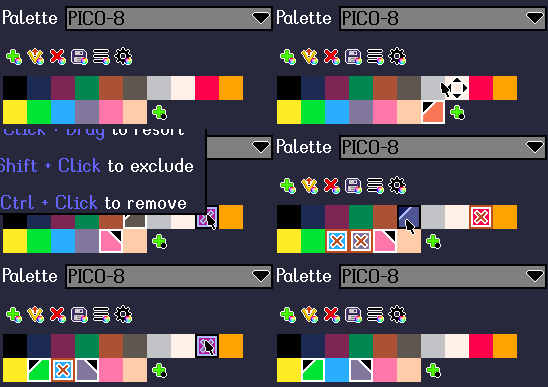
Users can click the plus icon with the black dot, representing the selected color, to add the selected system color (primary or secondary) to the current palette.
Users can drag and drop palette colors to resort them. Left-clicking a palette color will assign it to the primary color slot, while right-clicking will assign it to the secondary color slot. Shift + clicking a palette color will toggle its inclusion status, and Ctrl + clicking a palette color will remove it from the palette.
Bottom bar

The bottom bar is almost purely informational. It displays:
- the currently selected tool
- the target pixel (i.e. the canvas pixel that the mouse is aiming at)
- the canvas size (pixel width by pixel height)
- the zoom level
- selection information (number of pixels selected, selection bounding box coordinates + dimensions)
The only interactive elements in the bottom bar are the zoom slider and incrementation buttons.
SEE ALSO